This post was updated on July 2, 2025
Pressure-treated wood is chosen for decks, fences, and other outdoor structures largely because of its durability. The wood is treated with compounds that penetrate the fibers to help resist moisture, fungus, and termites. Despite being treated, finishing pressure-treated lumber is necessary to protect it from exposure to the sun, rain, ice, and other challenges. Here, I will explain how you can stain pressure-treated lumber successfully.

When to Stain New Pressure-Treated Wood
Unlike the drier and more porous wood of an older deck, new pressure-treated lumber usually contains significant moisture from the infusion of water and preservative agents applied during its manufacturing. Therefore, it is best to wait between 3-6 months before staining pressure-treated lumber. The necessary “dry time” for new, treated wood may vary based on the type of wood, the texture, and any drying methods used in production.
Before staining pressure-treated wood, perform a basic moisture test, which involves sprinkling some water on the surface. If the water “beads up” rather than soaking in, you should allow the wood to dry further.
Preparing the Wood for Staining
Surface Preparation
Remove any furniture and other items before starting. For the best results, the wood should be dry, smooth, and free of dirt, old stains, or paint. Using 60 to 80-grit sandpaper, lightly rub down the deck to eliminate splinters and any stubborn remnants.
Cleaning and Brightening
Using a deck cleaning product, thoroughly coat the wood and scrub it with a firm brush. Next, rinse the deck with a power washer at roughly 1,500 to 2.000 psi. Apply a neutralizer or wood brightener, which helps to enhance the absorbency of the wood and restores the pH balance fo your wood after the cleaning.
Stripping and Brightening
If you have an older stain that is transparent or semi-transparent, you will need to remove the older coating first using a deck stain stripper.
Masking and Edge Staining
Using protective materials such as drop cloths, tarps, cardboard, and painter’s tape, cover areas adjacent to the deck such as gardens, siding, or windows. Begin applying stain to edges, spindles, and other hard-to-reach points using a smaller brush or pad.
How to Tell If Pressure-Treated Wood Is Dry Enough to Stain
Ensuring that the wood is dry is important to achieving excellent results when staining pressure-treated wood. Prematurely staining pressure-treated lumber will result in insufficient penetration, which is necessary for effectively protecting against the elements. Also, the stain will trap moisture inside the wood and likely promote mold and mildew.
The Water Drop Test
Most deck stain manufacturers agree that the wood’s moisture content should not exceed 12-15%. Performing a simple water drop test is a quick way to make this determination. Place your fingers into a glass of water to sprinkle some droplets on horizontally positioned wood and wait a few minutes. The water will be absorbed into the wood if it has sufficiently dried. If the water pools or beads up on the surface, the wood will require more dry time.
Using a Moisture Meter
A moisture meter is a digital handheld device that will more precisely measure the dryness of wood. Some meters have metal pins or probes that penetrate the wood and may leave small holes. “Pinless” moisture meters are also available that use a flat sensor to emit electromagnetic waves.
Because dryness may vary, such as from exposure to direct sunlight, be sure to check multiple areas. Armstrong Clark recommends testing the underside of boards and end cuts, which are positioned in the shade.
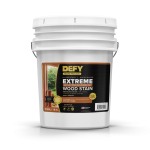
Best Stains for Pressure-Treated Wood
Oil-Based or Water-Based Stain?
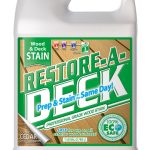
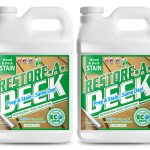
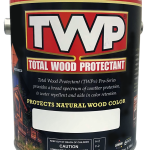
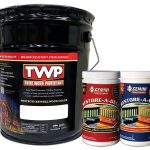
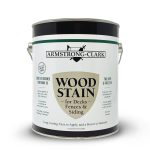
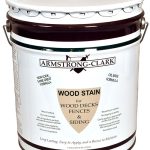
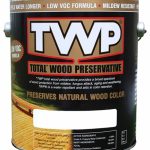
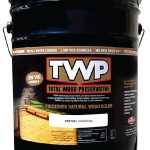
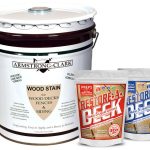
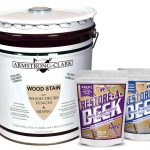
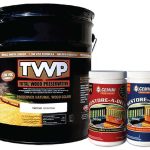
I suggest prioritizing a stain’s ability to deeply penetrate and absorb into the wood rather than if the product is oil or water-based. Three of the best stains are produced by Restore-A-Deck, Armstrong-Clark, and TWP.
The following table summarizes the characteristics and best applications of different stains:
| Stain | Drying Time | Opacity | Ideal Use |
| Restore-A-Deck | 2 to 4 Hours | Semi-Transparent | Mold & mildew protection in rainy/ humid climates |
| Armstrong-Clark | 8 to 72 Hours | Transparent, Semi-Transparent, & Semi-Solid | For DIYers (ease of application) |
| TWP | 2 to 8 Hours | Semi-Transparent | Wood aged for more than 4 months |
Choose the Right Stain
When selecting a product for staining treated wood, some of the variable considerations include transparency, color, surface condition, and local climate. Some of the primary categories of stain are transparent, semi-transparent, semi-solid, and solid. Transparent stains are ideal for clearly showcasing the natural appearance of the wood. Conversely, a solid stain more closely resembles paint and forms an external coating.
Unlike transparent or semi-transparent stains, solids offer the broadest selection of color options, which might be important if you are trying to match or complement existing wood siding or other objects. Those with older, weathered decks might choose a semi-solid or solid stain, which does a better job of hiding imperfections.
If you live in a region with extreme climate conditions, consider specialized stains. For example, if you live in a sunny, desert region, consider products with enhanced UV resistance such as penetrating oil-based semi-solid wood stains. Meanwhile, if you’re in an area with high humidity (e.g., Louisiana, Mississippi, and Florida), you’ll want a stain specifically formulated to resist mold and mildew.
Choosing a stain that penetrates well is critical when staining treated lumber, particularly when new. Generally, semi-transparent and semi-solid stains that penetrate deeply offer a good balance. These options should provide good UV and water protection without hiding the natural, wood-grain appearance.
Some of the best overall options for staining treated lumber include semi-transparent products from TWP, Armstrong Clark, and Restore-A-Deck.


Apply the Stain

Before staining, be sure to confirm that rain is not forecasted for the next 24 hours. When it comes time to apply your stain, always follow the product manufacturer’s recommendations. The general goal is to achieve maximum stain absorption and promptly discard any excess.
Some of the optional tools needed include:
- Deck stain brushes: Smaller, handheld brushes are used for applying stain to corners, tight openings, and other hard-to-reach sections. China bristle brushes work well with oil-based stains, allowing for back-brushing larger sections to ensure a consistent finish.
- Deck stain pad applicators: “Sponge-like” applicator pads, which are often mop heads, effectively absorb stain and are useful for covering large areas. Shur-line and Padco are both well-established manufacturers.
- Deck stain flooring brushes: Floor brushes, which attach to a threaded pole, are efficient stain application tools for covering larger areas.
- Paint-style rollers: Often composed of foam or polystyrene, rollers are primarily used with solid stains.
- Deck stain sprayers: “Pump-up” sprayers work well for transparent or semi-transparent stains. Airless sprayers typically work well with most stains, but they are more expensive and can be more difficult to use.
Note: Stain pads or flooring brushes are great for covering large areas. If the manufacturer recommends two coats, consider using a stain sprayer for the first coat and use a pad or brush for the second coat. Stain the stairs last before leaving the deck.
Finishing Pressure-Treated Lumber
Although it is chemically infused to protect against insects and decay, new pressure-treated wood should be stained to combat moisture, UV rays, and other elements. The lumber should be cleaned, brightened, and dried thoroughly before applying a high-quality deck stain. Here, I often recommend choosing an oil-based, semi-transparent stain, which will penetrate deeply for protection while enhancing the natural appearance of the wood. However, a semi-solid or solid stain is an option when trying to achieve custom colors or to hide existing flaws or imperfections.
Can You Paint Pressure-Treated Wood?
Yes. The finished appearance of the paint is similar to a solid deck stain. Stain typically absorbs into the wood, while paint coats the surface, meaning that you may need several coats of paint to achieve a smooth, uniform appearance.
Maintenance and Upkeep
Remove any pools of water and sweep the surface regularly. Use a high-quality deck cleaner to thwart the development of mold or algae. Your deck should generally be stained every 2 to 3 years.
Common Mistakes to Avoid
Some of the pitfalls to avoid include:
- Don’t skip steps. Remove all existing stains, thoroughly clean, and apply brightener before staining.
- Never use bleach or cleaners containing bleach on decks, as it may harm the lignin in the wood.
- Avoid sanding with anything finer than 80-grit paper, as it may hinder the wood’s ability to absorb stains.
- It’s better to replace any rotting or cracked boards rather than try remedial measures.
FAQs on Staining Pressure-Treated Wood
Best deck stain for pressure-treated lumber?
Because newer, pressure-treated lumber is less absorbent, choose a stain that penetrates deeply, such as semi-transparent products from TWP or Armstrong Clark.
Must I apply deck stain to a new pressure-treated deck?
Yes. After allowing the wood to dry for several months, applying a deck stain is necessary for long-term protection.
Do I need to prime pressure-treated wood before staining?
Primers are typically not recommended with deck stains.
Do you have to sand pressure-treated wood to stain it?
You should lightly sand pressure-treated wood if needed to remove splinters. Sanding too heavily makes the wood less porous and less able to absorb stains.
Is oil or water-based stain better for pressure-treated wood?
For pressure-treated wood, the ability of a stain to penetrate and deeply absorb is the primary concern, regardless of whether it is water or oil-based.
Can you seal pressure-treated wood right away?
New pressure-treated wood requires several months of drying time before applying sealant or stain.
Can I stain pressure-treated wood immediately?
Avoid staining new pressure-treated wood until it has sufficiently dried.
How long does pressure-treated wood need to dry?
New pressure-treated wood will need between 3 and 6 months to dry.
Questions? Ask Me Below!
Resources:
- https://www.homedepot.com/c/ab/types-of-pressure-treated-wood/9ba683603be9fa5395fab9052c50759
- https://www.familyhandyman.com/article/how-to-choose-a-deck-stain/
- https://www.currentresults.com/Weather-Extremes/US/sunniest-cities.php
- https://www.moldsci.com/media/fxud4ykp/ranking-the-moldiest-location-to-live-infographic-lr.pdf


I have a new deck with Yellawood. The Yellawood website indicates you can stain right away as long as it absorbs water doing the sprinkle test. I have also tested it with a moisture meter and it is 15 or less. Any issues with staining now?
“In the past, people waited six months or more before finishing projects that use pressure treated wood. That’s no longer the case with newer treatments like the micronized copper preservatives used to treat YellaWood® brand products. Now your project could be ready to be finished within 30 days of completion depending on a number of factors including your local weather conditions.” Yellawood website
You should always follow the directions of the stain brand you are using when staining new wood, not the wood manufacturer. Most want 3-4 months and then prep.
https://www.deckstainhelp.com/how-long-should-you-wait-to-stain-a-new-deck/
Does the same timing and action for decks hold true for railings and posts?
Yes.
I have pressure treated deck built 8 years ago and we added on to it last year, now the decks are 2 different shades, what is the best way to get them close to the same color, what is the best product to use. I am South facing and get sun all day
Upload some pics in the comments for advice.