This post was updated on April 19, 2026
✅ How to Stain a Deck (Quick Steps)
Staining a deck properly requires preparation, the right products, and correct application:
- Choose the best deck stain
- Choose the best deck stain applicators
- Prep the deck
- Allow the wood to dry completely
- Apply the stain following manufacturer’s directions
- Allow proper curing time

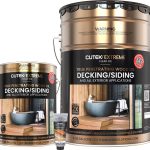
Pick Out the Right Deck Stain
What is the best deck stain to choose? It depends. You should choose a stain that is best suited for your deck and environment. Some of the variable factors include your climate, the condition of the wood, and the availability of certain stains based on the VOC regulations in your state.
✅ Step 1: Choose the Best Deck Stain
 The type of stain you choose will determine how your deck looks, performs, and how easy it is to maintain.
- Transparent: Natural look, minimal protection. Having a very light tint, transparent stains clearly show the natural grains in the wood (and any imperfections).
- Semi-Transparent: Best balance of appearance and durability (most recommended). With more color options, semi-transparent stains offer more flexibility, such as if you are trying to match the home’s existing trim.
- Semi-Solid: More color, slightly more maintenance. They offer superior UV resistance without fully masking the wood grain. Make sure to choose an oil-based version whenever possible.
- Solid: Opaque finish, highest maintenance over time. Similar to the texture of paint, solid stains create a uniform coating that hides the wood grain.
Pro Insight: Traditionally, semi-transparent and semi-solid stains have been my favorite because they penetrate the wood very well. In recent years, increasingly stringent environmental regulations related to volatile organic compounds (VOCs) have emerged. As a result, many manufacturers of semi-transparent stains altered their long-proven formulas to comply with the laws, which has resulted in products that poorly penetrate the surface. Be wary of using any semi-transparent or semi-solid that is sold at big box stores such as Home Depot or Lowes. These brands tend to “lie” about the opacity, and what you will end with will not be a true stain highlighting the wood grain but an opaque stain masking the wood grain. Example brands would be Behr, Valspar, Pittsburgh, and Olympic.
Durability
In general, solid stains have the best UV protection, and transparent stains require more frequent reapplication. For example, solid stains should last roughly 2 to 3 years on walking surfaces and 4 to 6 years on vertical surfaces and trim, but since they dry on top of the wood, they can be prone to peeling. Fully transparent stains often need to be applied annually, while semi-transparent stains offer a good balance between the two when it comes to UV protection and durability, lasting roughly 2-3 years on a deck surface when choosing a high-end brand.
Condition of Deck
Decks that are only a few years old will work well with transparent, semi-transparent, or solid stains. Older decks with more wear are best coated with a semi-transparent, semi-solid, or solid stain. For new decks, check out my posting, which explains how long to wait before staining and the surface prep details for new wood.
Climate
Decks in hot and dry climates need strong UV protection, and regions with heavy rainfall need to resist moisture and stop the development of mold or mildew. Be wary of any film-forming stains that dry on top of the wood in a cold weather state where freeze-thaw is an issue, as these stains may be prone to peeling and making reapplication more difficult.
See My Recommended Deck Stains.
Expert Tip: Most homeowners get the best long-term results with semi-transparent penetrating stains due to easier maintenance and no peeling.
A Concise Guide to Different Stain Types
Water-Based vs Oil-Based
In response to environmental restrictions regarding VOCs, the number of water-based stains has dramatically increased. The most stringent states include California, Connecticut, Delaware, D.C., Maine, Maryland, Massachusetts, Michigan, New Hampshire, New Jersey, New York, Pennsylvania, Rhode Island and Vermont. Parts of these states also have stringent regulations: Arizona, Illinois, Indiana, Ohio, and Virginia.
Water-based stains generally lack the capability of deeply penetrating the surface like an oil-based product can. Some benefits of water-based stains include being eco-friendly, resistant to mold and mildew, and usually dry quickly. Oil-based products penetrate and result in a natural-looking finish; however, they take longer to dry and are more odorous.
Solid Color Stains
Known for providing superior UV protection, solid color stains are mostly water-based. Because of their “paint-like” coated finish, solid stains help mask flaws. After applying a solid stain to the deck, it’s unlikely that you could transition to a transparent stain again.


Semi-Solid Deck Stains
Both water and oil-based types of semi-solid stain exist, but significantly fewer manufacturers produce them. Like solid stains, semi-solids hide most of the wood grain and offer excellent UV protection.
Pro Insight:If using a semi-solid stain—grab an oil-based option.


Semi-Transparent Deck Stain
Available in water or oil-based formulas, semi-transparent stains offer the “best of both worlds.” Semi-transparent stains will allow for the natural wood grain to show and provide adequate UV protection.


Transparent Deck Stains
Because they have very little pigment, transparent stains create a natural wood finish. You will typically need to stain your deck each year if you choose a transparent stain.
Clear Deck Sealers
Clear deck finishes are easy to apply but are primarily used for repelling water. They offer very minimal to no UV protection and will need to be applied every 6 to 12 months since they gray naturally.
✅ Step 2: Choose the Best Deck Stain Applicators
Using the right applicator is just as important as the stain itself.
- Stain Pads: Best for even application on deck boards
- Brushes: Ideal for working stain into wood grain and detail areas
- Sprayers: Fast application, but must be back-brushed for even coverage
Pro Insight: Spraying alone is not enough—back-brushing ensures proper penetration and prevents uneven results.
Here Are the Tools and Materials You’ll Need
 Wondering how to apply stain to decking? Check out this posting regarding stain applicators.
Being properly equipped is critical for getting the job done right, so review the following applicator options.
Deck Stain Brushes
For applying stain to edges and other hard-to-reach areas, a wood stain brush is the best choice. To apply oil-based stains, sealers, or toners, choose a China bristle brush, which is composed of natural, animal-based material that provides an even finish. For large areas, a 4 to 6-inch China bristle brush allows you to easily “backbrush” and achieve a uniform finish.
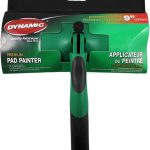
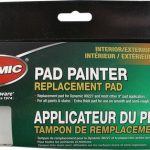
Deck Stain Pads Applicators
Applicator pads or mops are great tools for easily staining large areas. For example, Padco and Shur-Line make quality stain pads of different sizes with replaceable pads that get the job done much quicker. Padco stain pads absorb plenty of stain, which makes them great for large areas. In most cases, we prefer to use a stain pad for the railings and edges. They allow you to “push” the stain into the wood when applying.
Deck Stain Flooring Brushes
 Flooring brushes that attach to threaded poles have recently appeared in the realm of deck staining and have shown promise, particularly with clear, transparent, or semi-transparent products. Consider using 5-gallon Wooster Wide Boy Buckets to hold the stain during application.
Pro Insight: Buying a larger 14” Floor Staining Brush will make staining your horizontal deck surface a breeze. An average 500-square-foot deck floor can be stained in 30 minutes.


Paint Rollers for Decks
Often composed of foam or polystyrene fibers, paint rollers are another option for staining your deck. Wide paint rollers are useful for covering large surface areas in a short time.
Paint rollers are less suitable for coating hard-to-reach areas and may waste stain, as excess liquid often drains through the cracks. Rollers generally hold less stain than pads and are not suitable for use with transparent or semi-transparent deck stain products.
Paint rollers vary in thickness based on the “nap.” Rollers with a 3/8 to 1/2-inch nap are best for rougher deck surfaces; otherwise, those with either a 1/4 or 3/16-inch nap are fine.
Pro Tip:The best tools for applying stain vary according to the type of stain you are using. “Paint-style” rollers are your best option for solid-color stains. However, they are generally discouraged for “thinner” stains because they may create splatters that make it very difficult to apply evenly.
Deck Stain Sprayers
Pump-up style deck stain sprayers are effective for use with transparent or semi-transparent stains. Models such as those made by Chapin feature three adjustable nozzle settings that work well. Airless sprayers are another option. Despite being more expensive, these work well for most stains, but some people find them more challenging to use at first. Check out these handy spraying tips.
Pro Tip: When applying a deck to wood stains with a sprayer, be careful to watch for drips or runs on your vertical areas. Back brushing after spraying will help to ensure an even application.
Choose the Right Day and Time
The time needed to complete the project will vary based on the size of your deck, but typically, I like to set aside a weekend. If you’re replacing damaged boards and performing substantial sanding work, set aside two to three days.
Check the weather forecast for the upcoming days for any chances of rain within 48 hours. The ideal temperature range is between 50 and 90 degrees F. Avoid staining during periods of extreme heat or direct sunlight.
Pro Tip: Restore-A-Deck Wood stains allow more leeway when dealing with rainy weather as they can be applied to damp or dry wood. You can even stain the same day as the prep. They can take rain within 4-8 hours after application.
You’re Ready, Here’s How to Stain Your Deck

Lightly sand your wood deck to remove any splinters.
✅ Step 3: Prep the Deck (Keep This Brief)
- Clean or strip if needed
- Brighten the wood
- Remove dirt, mildew, and old coatings
Remove all furniture and other belongings from the deck. It is important to remember that old stains, paint, and other imperfections will likely be visible after you stain the surface; thus, always ensure the surface is clean, dry, and smooth. If needed, lightly sand the deck to remove any splinters, moving in the same direction as the wood grain, using 60 to 80-grit sandpaper. Remove all dust and particles by sweeping or using a leaf blower.
Pro Insight: Do not over sand! You want the wood to be porous, not overly smooth, so your deck stain can thoroughly soak in. 60-80 grit paper is best.
Clean or Strip Your Deck
Clean or strip your deck using products intended for this purpose and follow the manufacturer’s instructions. Apply the appropriate prep products and agitate the surface thoroughly by scrubbing with a firm brush in the same direction as the wood grain.
After scrubbing the surface, wash with moderate pressure using a power washer around 1500 to 2000 psi. Immediately after cleaning or stripping, rinse thoroughly and apply a deck brightener, which is often called a neutralizer. The brightening process helps open the “pores” in the wood and neutralizes any remnants of the cleaning product you previously applied.
✅ Step 4: Allow the Wood to Dry Completely
Before staining:
- Wood must be fully dry (typically 24–48 hours after prep). *Restore-A-Deck stains can be applied to damp wood, the same day as prep
- Moisture content should be below ~15%
- Surface should absorb water easily
Expert Tip: If water beads on the surface, the wood is not ready to accept stain.
✅ Step 5: Apply the Stain
How to Apply Deck Stain Properly
- Cover and protect surrounding areas
- Apply thin, even coat(s)
- Work in small sections (2–3 boards at a time), full length
- Maintain a wet edge to avoid lap marks
- Back-brush or pad for even penetration
- Do not over-apply—excess stain may not absor
Expert Tip: Over-application is one of the most common causes of deck stain failure.
Cover, Protect, Control Where the Stain Goes
If necessary, use drop cloths or tarps to cover any surrounding lawn and garden areas. Painter’s tape or cardboard is an excellent means of protecting siding, trim, or fixtures near the deck.
Use a Small Paintbrush or Pad to Stain the Edges

Use a brush to paint smaller surfaces and details.
Start by using a small pad or brush to stain railings, spindles, edges, corners, and other tight or hard-to-reach surfaces. Place cardboard on the floor below to catch any drips of stain when working on vertical areas such as railings.
Move Fast!
When edging the deck by the home, be careful not to let the stain dry and keep a wet edge. You want to make sure your stain on the floor will blend properly. Having an extra person help when staining the floor will make the process easier, and the end results much better.
Apply the Stain to Large Areas
Start staining the surface areas within 2 feet of the house or other adjacent structures first using a stain pad or large flooring brush. If the manufacturer’s instructions suggest applying two coats, use a sprayer to complete the first and then a wide stain pad or brush affixed to a pole for the second coat. Solid stains are not compatible with pump sprayers; therefore, apply both coats with rollers and brushes. When doing two coats, follow the manufacturer’s dry time instructions in between.
Pro Insight: See this guide for instructions about applying a second coat for stains that require “wet on wet” application.
Stain the Finer Details

If the manufacturer recommends two coats, you can use a sprayer to apply the first coat.
Pay close attention to the edges of the deck boards, as stain tends to collect and run along these areas. Look for any drips or buildup forming along the grain and smooth them out immediately with a brush. Ignoring these spots can lead to uneven drying and a blotchy appearance.
For railings and vertical surfaces, apply stain in thin coats and brush out any excess to avoid runs. These areas are more prone to dripping, so it’s important to check them frequently as you work.
Pro Insight: Touch up any missed or thinly applied areas with a brush or stain pad before the stain dries. This will make the stain blend much better.
✅ Step 6: Allow Proper Curing Time
After application:
- Avoid foot traffic for 24–48 hours
- Keep deck dry during curing
- Full cure may take several days, depending on the product
Pro Insight: Even if the surface feels dry, the stain may still be curing underneath.
Wait for the Stain to Dry
Allow the stain to dry completely according to the manufacturer’s instructions before walking on the deck, which should take approximately between 24 and 48 hours.
✅ Common Deck Staining Mistakes
- Applying too much stain
- Not back-brushing after spraying
- Staining in direct hot sun
- Stopping mid-board (causes lap marks)
- Using the wrong applicator
✅ Best Conditions for Applying Deck Stain
- Temperature: 50–85°F
- Avoid direct sunlight during application
- No rain for 24–48 hours
- Low humidity preferred
✅ Additional Tips Before You Get Started
- Allow the stain to absorb properly, then remove any excess; it will likely dry blotchy or uneven if overapplied.
- Avoid applying stain in direct sunlight, as the heat may cause it to dry before it fully penetrates the wood.
- Don’t sand new decks, as it will create a smoother surface that prevents the stain from penetrating the wood. See our new deck stain article for more tips.
- Buy a little more stain than you think you’ll need—just to be sure you won’t run out near the end.
- If changing brands, colors, or types of stain, always completely remove any existing coatings first, and use a deck stain stripper if needed for stubborn material.
- Important Safety Note: When applying an Oil-Based Stain, canvas tarps and any rags should be saturated with water and allowed to dry before disposing of. DO NOT leave tarps or any rags in direct sunlight or in/near the house. They can cause a fire!
At the end of the day, preparation is king when staining your deck. To reiterate, simply choose a stain appropriate for your deck and climate, use the application tools I recommended, and follow the manufacturer’s instructions, as they are most knowledgeable about the specific product. Your deck will be pristine in no time!
✅ How to Stain a Deck – FAQs
❓ Why Did My Deck Stain Fail?
Deck stain failure is one of the most common frustrations for homeowners. In most cases, the issue comes down to either application mistakes or using the wrong type of stain.
⚠️ Common Application Mistakes
Proper prep and application are the leading causes of stain failure:
- ✔ Applying a water-based stain over an oil-based stain (or vice versa) without proper prep
- ✔ Not fully removing a failing or peeling coating before recoating
- ✔ Assuming new wood is ready to stain without proper prep and drying time
- ✔ Over-sanding the wood (finer than 60 grit), which reduces stain penetration
- ✔ Failing to properly clean and brighten the wood
- ✔ Over-applying stain, causing it to sit on the surface instead of soaking in
Expert Tip: Most failures are caused by poor prep or over-application—not the stain itself.
⚠️ Problems with the Stain
Sometimes the issue is the product:
- ✔ Lower-quality stains may not penetrate properly
- ✔ Film-forming stains are more prone to peeling and failure
- ✔ Some brands have inconsistent long-term performance
- ✔ Clear or lightly pigmented stains lack adequate UV protection
👉 Penetrating stains perform best because they absorb into the wood instead of forming a surface film.
✅ How to Avoid Deck Stain Failure
- ✔ Use a high-quality penetrating stain
- ✔ Fully remove old or failing coatings
- ✔ Properly clean and brighten the wood
- ✔ Allow the wood to dry completely before staining
- ✔ Apply thin, even coats (do not over-apply)
Pro Insight: Choosing the right stain and prepping correctly will prevent most problems before they start.
🚫 Should You Add a Sealer on Top of Deck Stain?
No—this is a common mistake.
- ✔ Quality deck stains already act as sealers
- ✔ Adding a clear sealer can cause adhesion issues
- ✔ Clear sealers offer little UV protection
- ✔ Applying a sealer over stain often leads to peeling and failure
🛠 Application Basics
What is the best way to apply a deck stain?
Use a stain pad or brush for the most even coverage. Sprayers can be used but should always be followed by back-brushing.
How many coats of deck stain should you apply?
Most penetrating stains require only one coat. Applying too much stain can lead to buildup and premature failure.
🎯 Technique & Results
How do you avoid lap marks when staining a deck?
Work in small sections (2–3 boards at a time), maintain a wet edge, and never stop mid-board.
Why does my deck stain look uneven?
Uneven results are usually caused by over-application, poor prep, or inconsistent application technique.
⏳ Drying & Timing
How long should you wait before using a freshly stained deck?
Wait 24–48 hours before light foot traffic. Full curing may take several days.
Can you stain a deck in one day?
Yes, but only if prep is already completed and weather conditions are ideal.
⚠️ Common Issues
What happens if you apply too much deck stain?
Excess stain can sit on the surface, leading to peeling, tackiness, or uneven drying.
Can you fix a bad deck stain job?
Yes. Most issues can be corrected by cleaning, light prep, and applying a maintenance coat.
🔍 Choosing the Right Product
What type of deck stain is best?
Semi-transparent penetrating stains are the best choice for most decks because they offer durability, a natural look, and easier long-term maintenance.
🔧 Troubleshooting Deck Stain Issues – FAQs
❓ Why is my deck stain peeling?
Deck stain peeling is usually caused by using a film-forming stain, over-application, or applying stain over a surface that was not properly prepped. Penetrating stains are less likely to peel because they soak into the wood instead of forming a surface layer.
❓ Why is my deck stain sticky or tacky?
A sticky or tacky deck stain is typically the result of applying too much stain or not allowing proper drying conditions. Excess stain that cannot absorb into the wood will remain on the surface and fail to cure properly.
❓ Why is my deck stain fading so quickly?
Fast fading is often caused by insufficient UV protection, using a stain with little or no pigment, or heavy sun exposure. Clear or lightly tinted stains will fade faster than semi-transparent or semi-solid stains.
❓ Why is my deck stain blotchy?
Blotchy stain results are usually caused by uneven absorption due to poor prep, skipping the brightener step, or inconsistent application. Maintaining a wet edge and applying evenly helps prevent this.
❓ Why didn’t my deck stain soak into the wood?
This can happen if the wood is over-sanded, still sealed, damp, or previously coated. The surface must be clean, porous, and dry for proper penetration.
❓ Why does my deck stain look darker than expected?
Older or dry wood tends to absorb more stain, resulting in a darker appearance. Test samples are always recommended before full application.
❓ What happens if it rains after staining a deck?
Rain shortly after staining can interfere with curing and may cause streaking or uneven results. If this happens, the deck may need to dry and be lightly recoated.
❓ Can you fix peeling or failing deck stain?
Yes. Failing stain should be removed with a deck stain stripper, followed by cleaning, brightening, and reapplying a penetrating stain.
✅ Have Questions? Ask Below, I’ll Answer
Have further questions about how to stain your deck? I encourage you to comment below in our question-and-answer section or visit our forum. This interactive platform is useful for consumers and industry pros. You can share photos of your work, check out Q&As on applying stain to decking, product reviews, and much more.


I wish this site existed years ago when I had my first pool deck installed. Great information!
I am having an above ground pool deck installed next week ( December 2025). The wood is KDAT brown from Northern Crossarm. I am seeing lots of recommendations from the company and other KDAT information sites that the wood needs to be treated almost immediately after installation. I will not be able to treat it for 4-5 months. I am in Pennsylvania and the temperature will be too cold until Spring. Is this going to be a problem?
Also – what stain do you recommend for a KDAT pool deck that gets full sun all day?
Is it easier to prep and reapply stain on a deck that has semi transparent stain as opposed to semi solid stain?
Do you have any experience with Northern Crossarm, Northern KDAT Deck Sealer?
You need to let the wood weather and be prepped, so Spring is the correct answer. See tips on new wood and the best stains to use:
https://www.deckstainhelp.com/how-long-should-you-wait-to-stain-a-new-deck/
Excellent website, thank you. I have a 20 year old ipe deck that is above my workshop/basement which makes cleaning, stripping and brightening off limits as the product/rinsing with run off into the basement. Using 40-60 grit I’ve removed the grime and brought some life back to the wood. I’d like to try and keep the color as close to natural as possible. I’m in Hawaii with high UV and decreased product availability. What product(s) would be best to use given the limited deck prep that can be done annually/biannually? Would Penofin premium/blue/hardwood be a better option if I just apply biannually? Does RAD have to have step 1 and 2 before reapplication? Thank you for your time and expertise.
Penofin is a poor stain and turns dark or black over time:
https://www.deckstainhelp.com/penofin-hardwood-wood-stain-review-updated/
The best products for IPE cannot be bought in Hawaii, unfortunately:
https://www.deckstainhelp.com/hardwood-deck-stains/
Thank you for your response. Looks like messmers and Defy are the only recommended ones I can get. I did read your reviews on both. Do you have a preference between the two? Thank you.
They are both decent. Either way you will have to recoat annualy. If you prefer oil-based, then go with Messmers. Defy is water-based. You may get slightly longer UV with the Defy.
Hello! I am just getting started on a large covered deck project. It is 10 year old tongue and groove that was painted with SW Semi-Solid Stain (Hill Country – dark grey). I didn’t love it from the moment it went on the T & G deck and then grew to really not like it with 3 boys & a dog making the finish look terrible! I am just getting started on how to change it. I have sensed several areas to see how the T & G looks under and it looks good. I like the natural state of the T & G, but worry that a transparent stain may not be the best option with 10 year old T & G. Would you do A) transparent, B) semi-transparent in the same dark grey) or C) paint it with a heavy sealer? It is a huge wrap around porch (800 sq ft) that is beautiful, just needs some TLC. Thoughts?
My prep plan is sanding the entire porch, clean use brightener, and then stain.
Read this about how to sand a deck:
https://www.deckstainhelp.com/how-to-sand-your-wood-deck/
When done with the prep, use a semi-transparent penetrating stain. Just one coat since you are sanding:
https://www.deckstainhelp.com/best-semi-transparent-deck-stain-reviews/
Brightener or no brightener?
After sanding, yes.
Hi Scott, yesterday just finished stripping and brightening deck. NOW THE WEATHER forecasts long range are lows in the 30’s and low 40’s, highs in low 50’s. Am I stuck waiting till spring to stain (TWP 1500) ? I don’t want to tempt low temperatures that would cause failure of the stain after all this work. If I do wait until spring, do I need to rewash and brighten the wood?
Temps need to be mid-50s for the staining and cannot drop below 40 the first night after. If you cannot do it this Fall, then you will need to clean and brighten for prep in the Spring before staining.
Well that’s a strain. Thank you for response. Cold snap doesn’t look promising for the lows.
Couple of questions. I hand sanded our old redwood deck with 80 grit in June and applied two coats of ready seal. It already needs another coat (CA full sun) so think I’ll switch to twp if you think longevity is better but now I’ve applied redwood color stain can I now maintain with clear or nearly clear? I do not want the deck to keep getting darker like last time (which is why I sanded as turned a horrid brown with deep dog claw scratches and high traffic patches)
Other question, with it being only recently done should I just sweep and reapply or brighten?
Last question is I did my teak furniture too with the same oil stain, after sanding (as was sick of having to sand failed varnish every year) but one chair went spotty after it rained the other day despite it having 3 months to cure 🤦♀️ ) though it’s a bit better after it rained heavier. any recommendations with outside furniture and oil stain.
No, you cannot maintain with a clear coat over a stain color. Additionally, if you switch to TWP, the RS must be stripped off. Use this kit:
https://www.deckstainhelp.com/product/restore-a-deck-stripper-brightener-kit/
You can use the TWP on the furniture after you remove the RS.
I live in the Seattle area. We get lots of rain, as you would’ve guessed. I need to strip and re-stain my stairs and deck. It’s made of pressure treated wood and cedar. If I’m starting fresh what stain do you recommend? I’d like something with a dark transparent stain that holds up well and is easy to maintain.
TWP 1500 Series in Dark Oak or Black Walnut would work very well.
So I stripped my deck today and then applied the brightener but during the application my sprayer failed and I had to apply in an alternate fashion doing so caused me to not have enough to put brightener everywhere. I had wanted to stain tomorrow but now not sure if I can. Is there a substitute product to use or ok to skip the brightener I did pressure wash after stripping. I could stain most and go back to the 2 areas if I need to order more brightener.
It may not stain evenly if you don’t brighten all the wood evenly.
So since the unbrightened areas are 2 sections that are very distinct can I go back and brighten them ? 1 is steps the second is a strip that in its own section and if yes do I just mist and apply the brightener ?
Yes, you can brighten them. Just apply and rinse off when done.
One more question. I just did the “bead test” on my 13-month-old PTP (smooth, higher grade) deck. I was ready to go with either TWP1500 or DEFY Extreme (crystal clear) so that the wood would be protected but gray naturally. This “deck” is actually a 16 X 20 foot porch with a gabled roof. My “bead test” showed that the wood that has been exposed to the sun is ready for a sealant, but the lion’s share of the floor is not ready. I used DEFY’s bead test instructions, i.e. allowing only a few seconds before absorption. What should I do?
Wait until Spring. Additionally, when you prep, you remove the mill glaze, which should make it more porous.
Hi
I am about to apply Armstrong-Clark semi-transparent stain on pressure treated pine (>1yr). Wood was cleaned and brightened about a week ago. Do I need to worry about the wood moisture level?
(it rained hard 2 days ago, next few days should be clear).
Temps 70 (day) 50 (night)
You are good to stain.
Thank you
I Power sprayed the entire deck. Would I need to use a brightener?
Post a pic in the comments of the deck for prep help.
Is it best to brush stain on the deck? Should I stain the underside of the deck if it is easy to get to?
No need to stain undersides. The application method varies depending on the stain brand and type being applied.
Plan on using: Restore A Deck. Could I simply Hand Brush the entire Deck, or would a stain pad applicator be just as good?
Pad applicator or the flooring brush is best:
https://www.deckstainhelp.com/product-category/brushes-stain-pads-sprayers-and-tools/
The underside of the deck is the “roof” for another cement deck underneath the raised deck…. Still no need to stain?
There’s no need, but you can do so for aesthetic reasons.
We put in 2 new decks (about 4 months ago) in Tallahassee FL. Both are 20’x16′, with 3 stairs total (2 steps each). What would you suggest as prep and stain? We’re also open to the idea of hiring a local professional as long as they are good.
See this article about new wood:
https://www.deckstainhelp.com/how-long-should-you-wait-to-stain-a-new-deck/